Are your maps, camping trip notes, brochures, and vacay photos in a messy pile or stuffed in a bin? Do you wish you could remember where you found that special campsite on BLM land or which 4×4 route was best to get there? Do you waste time looking for your menu or checklist from the last trip you’d like to use again?
Simple and easy DIY tool geared for campers
After many years of camping and collecting maps, journals, and checklists I’ve found a simple way to keep my trips organized in the form of Camping Trip Notebooks.
Typical RV and camping logbooks are geared towards campground camping with their amenities. However, as a boondocker I need to record off-road campsites, how I got there as well as other pertinent info. So, I created my own customized Camping Trip Notebook to keep all of my “stuff” in one handy place. This simple DIY method is easy to use so you find what you need when you need it saving time, frustration, and valuable space.
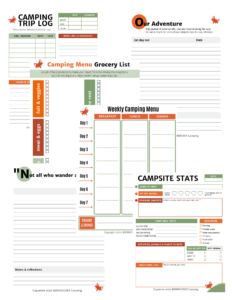
The perfect companion to really make your notebook a powerful tool is the EVERYTHING Camping Organizer Notebook with printables for your trip log info, campsite stats, a camping journal section, a weekly menu planner with a shopping list, and multiple checklists.
You can pause reading this “how-to” tutorial and get our easy organizer templates now.
In this tutorial, you will find specific directions on how to keep your checklists, menus, maps, and trip notes in one handy place for easy reference. Your notebook can also work as a planner so you don’t get overwhelmed with menu planning, as well as for keeping your checklists so that you don’t forget that ONE thing that makes or breaks a fun outing…..darn, no can opener for the beans or oh no! we are out of toilet paper.
Step 1 – Collect your materials to create your notebook
Check out this summary list to find out what you may already have on hand or what you need to shop for. The other steps will provide more detail with *shopping links. You will find specific directions on how to keep your checklists, menus, maps, and trip notes in one handy place for easy reference.
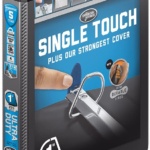
- 3-ring binder with view cover
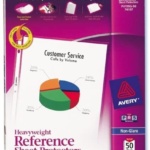
- Protective page covers
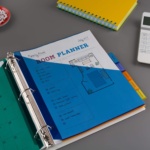
- Tab dividers with pockets
- Photo/recipe/postcard storage pages
- Zipper storage pocket
- Label maker or marker
- Printer and printer paper
- Collect your lists, maps, brochures, etc. to place in your notebook
Step 2 – Start with a binder-style notebook
A simple 3-ring notebook is the key to organizing all of your maps, menus, and campsite notations so that you can reuse and refer to them over and over again. You can tweak my basic instructions to customize your notebook to your own particular interests.
- Notebooks with a clear view cover are a great way to insert a photo, map, or pamphlet to easily identify your Trip Notebook.
- A binder with inside cover pockets is handy to hold a photo CD, maps, as well as loose info you collect from your trip.
- The thickness of the notebooks varies. You can buy several thin 1-inch binders for favorite camping areas or, buy a thicker notebook with multiple tabs for long trips or perhaps designate by park area or state.
- Binders come in many colors. You can use white, black, or have fun with a color that may represent the desert or forest.
- Here’s an easy affiliate link to my favorite heavy-duty binder by Avery on Amazon.
- One more durable idea I want to try – a zippered notebook with carrying case.
Step 3 – Protective Page Sheets
These protective covers are made ready with 3 holes so you don’t need to punch holes in your pages to fit your binder. The covers make your pages durable for handling while camping and will help them to last for repeated use. Pages will consist of your checklists, menu, journal, trip log, etc. I have created a set of printables customized for boondock style camping which you will see later in this tutorial.
I like the wide top loading heavy-duty Reference style protectors. Here is your link to check them out.
Step 4 – Printables
The Printable Pages I have created in the EVERYTHING Camping Organizer Notebook will get you off to a great start. Print them out to use and then insert them into a page protector to become part of your notebook. Or, save the digital files to your phone or laptop for easy referral.
- My copyrighted printables are created as PDFs for you to download and reuse as often as you want for your personal use.
- The pages look great in black and white as well as in color.
- The Camping Weekly Menu Planner is an editable PDF you can type directly into, or you can handwrite your meals in the spaces provided.
- During the trip you can pull out your pages to fill in the stats and write in your journal, using the hard surface of your binder for writing.
- I like to put my menu on a clipboard to hang inside a camper cabinet to refer to for preparing meals. After the trip the menu goes back in my notebook to use it as well as the grocery shopping list to save time planning the next trip.
- The printables include; Camping Trip Log, Campsite Stats, Weekly Camping Menu, Camping Menu Grocery List, Trip Index, all kinds of checklists so you won’t forget anything important, and multiple Journal pages with inspiring quotes.
- Buy the PDF download with 6 handy guides on sale to jumpstart your planning and packing.
Step 5 – Divide and Organize with tabs
Divider tabs will help you organize and refer back to specific pages. You can easily refer to your menu and grocery list, find a specific campsite log, and separate sections of your trip.
- If you have a thick notebook, you can create a Contents Page to refer to colored tabs you designate and name.
- I like sturdy vinyl dividers with 2 pockets and tabs that extend beyond the notebook for easy reference.
- Name your tags with a thin permanent marker, label maker or use the paper insert tabs.
- Tab names I use are: Itinerary, Meals, Checklists, Info, Photos and Trips. My Photos section is for camera notes.
- You can divide by location with a separate tab for each place you explore. Place the Camping Stats page for that specific destination 1st to give a quick summary.
- The Info section can be for flora, fauna, history, astronomy & fishing. If you have a lot of info, then further subdivide for easy reference.
- Here’s a link to the dividers I like and use.
Step 6 – Put it all together
Once you have your notebook and dividing tabs, you can start putting your pages inside. Wait to name your divider tabs until you know what you want to keep in your Trip Notebook. You can arrange your Campsite Stats pages (see Printables section) in chronological order and refer to their names on the Journal pages as you notate details of your trip. If you have a lot, divide the Stats pages into sections by area ie State Park, mountain range, etc.
- Print out and fill your notebook with Camping Stat, Camping Trip Log, and Journal pages ready for you to fill out while on the road. This is much easier than trying to rely on your memory later. The pages are made to quickly fill in the main details. You can do your journaling at a later time with the main details already recorded to help you write down your adventure story.
- You may want to name your divider tabs as you go or add new dividers as your notebook grows. Upon your return home, add your thumb drive or CD of photos, print photos, etc. to complete the recording of your trip.
- Insert your menu, grocery list, checklists et al in your notebook to keep handy for planning your next camping trip. Having a menu and shopping list already filled out saves me a lot of time. I simply copy the shopping list and check off the items I already have on hand, so that I know what is left for me to buy. The menu can be easily changed and reprinted. Since it is an editable PDF file, you can type directly into the page from a fresh page. Just remember to save the original and rename your filled-in pages.
- Make a Trip Index page (you can use lined notebook paper or get custom printables of my stat pages) listing your campsites so you can easily refer back to them later. Use Post-it color sticky tabs to mark each location/trip title with a color. On the index list the color that matches the tab you placed on the corresponding trip pages. I like to have my Campsite Stats and Journal pages placed together in my “Trips” section and color-coded per location so I can refer to it quickly.
“To achieve great things, two things are needed; a plan, and not quite enough time.” – Leonard Bernstein
Extras you might like
-
Specialty pages -It’s handy to include storage style pages made to hold recipe cards, printed photos, postcards, pamphlets, etc. I like the C-Line Ring Binder Photo Storage Pages for 5 x 7 inch photos that are side loading, holding 4 photos, postcards or recipes per page. Here is a link to the style of storage page I use.
- A label maker – is great for creating a title of your trip on the spine of your notebook as well as to label your divider tabs. I also use a label maker to label small bins in my camper kitchen cabinets to easily find my stored items ie Coffee, Bread goods, Canned goods, Dishtowels, etc. I use the Dymo brand label maker or simply use a permanent marker.
- Zippered storage pockets – I like to have handy pockets in my notebook to store receipts, pencils, pamphlets et al. A simple quart size ziplock style baggie works to hold loose receipts, business cards, etc. that can be placed into a pocket in your notebook.
Here is a link to a zippered pouch made to go in a 3-ring binder to keep your pens, pencils, a photo thumb drive, etc. handy and secure. You can switch out the pouch between notebooks or get a pouch to go with each Camping Trip Notebook. - Post-it style sticky flags – use these as tabs to mark and identify your trips by color and list them on a Trip Index page.
*Just so you know, many of the shopping links I have listed are Amazon affiliate links from which I earn a small commission at no extra cost to you. These are products I use, like, and refer to my friends and readers. The Printable Pages for download are from my own research and design.
Pinterest Pin for you
Pin this for future reference.
If you have more ideas for making this notebook even better, please feel free to share them with our fellow boondockers by commenting below. Other camping tips can be found on our website. Happy trails!
